In looking for an easier way to do hub and spoke tunnels between Fortinet sites, I recently started looking into dialup configuration and handling failover with OSPF.
We could technically deploy using SDWAN, but in an effort to simplify config, management and avoid using Fortinet’s “VPN WIZARD”, I decided to take some time to learn/test the setup and see if it was viable.
Step 1. The Hub
The hub is naturally an important part of the configuration. In order for OSPF to work, all tunnel interfaces need to be assigned an IP address. Which, can be a pain to do manually. Luckily the Hub vpn configuration can take care of that for us.
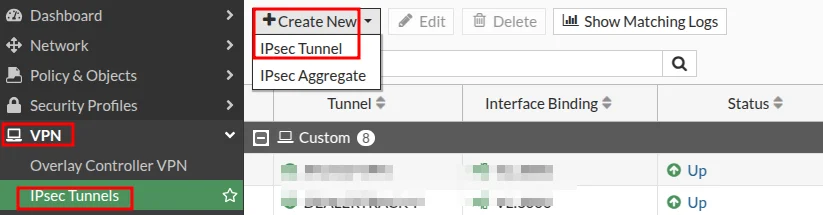
Start off by going to VPN –> IPSEC Tunnels–> Create New Ipsec Tunnel

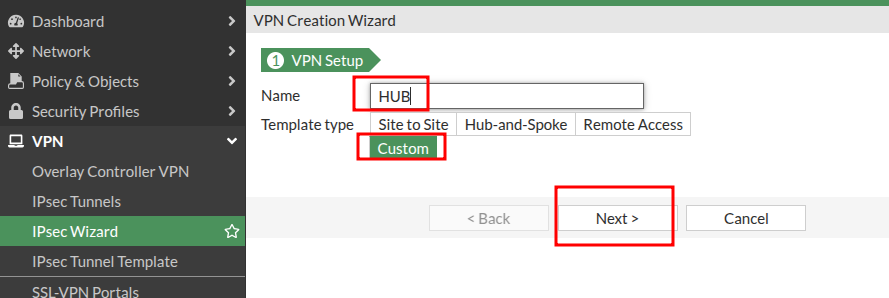
Next select the “Custom” option, set a name for the tunnel and click “Next”
Now the fun begins.
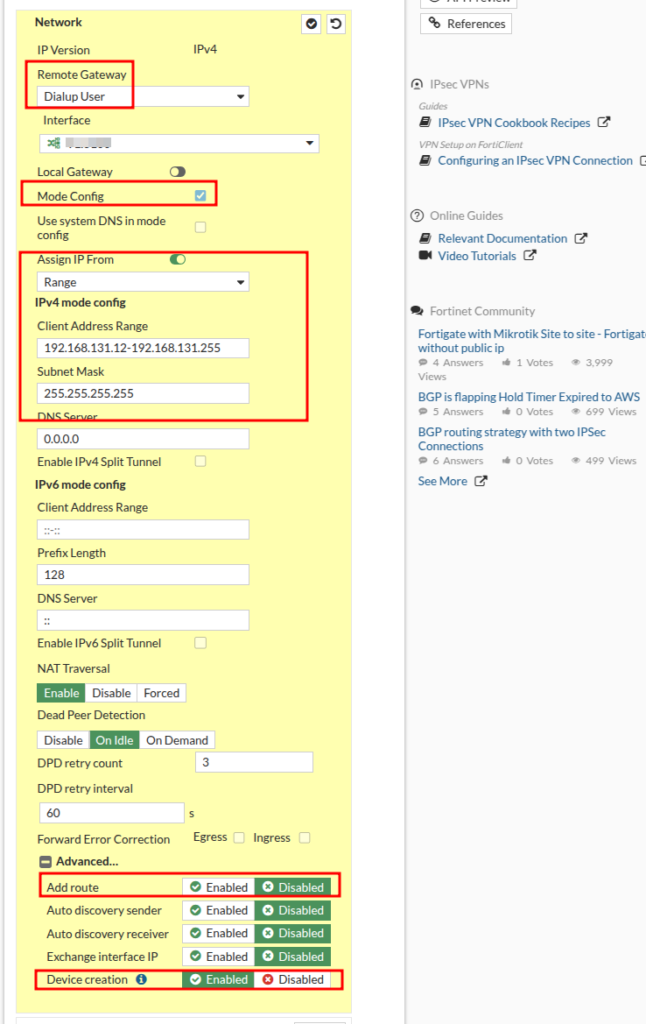
- You will set the Remote Gateway field to “Dialup User”. Assign the Interface that will be listening for VPN requests.
- Mode Config box needs to be ticked – this is important for creating the IP addresses on the tunnel
- The Range of IP Addresses needs to be an IP range not currently in use. It is carved into /30 as IPs are handed out to the HUB Tunnel interface and every Spoke tunnel interface.
- Disable “Add Route” in Advanced Settings
- Enable “Device Creation” in Advanced Settings
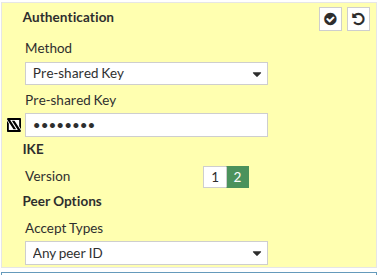
For the next section, put the settings you want to use here, assign a pre-shared key and select “Accept any Peer ID”
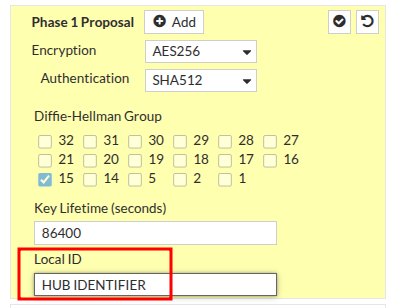
For the next section, put the settings you want to use and then enter text for local ID that will help you easily identify your hub
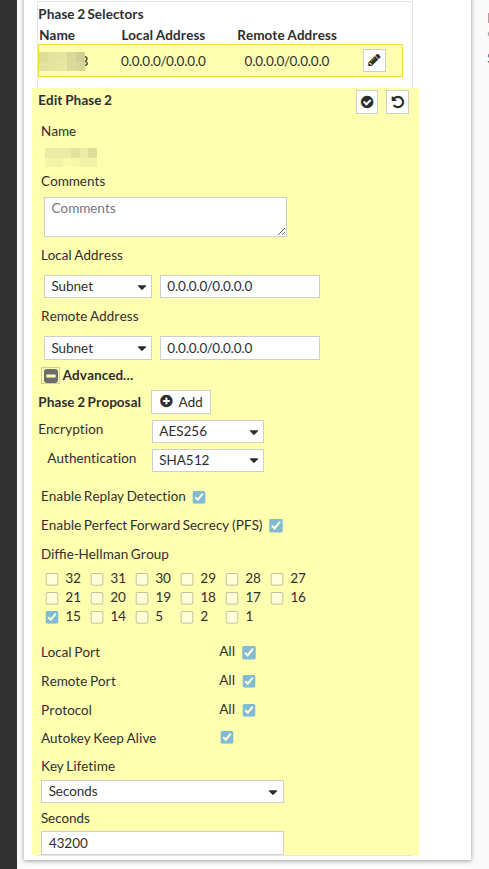
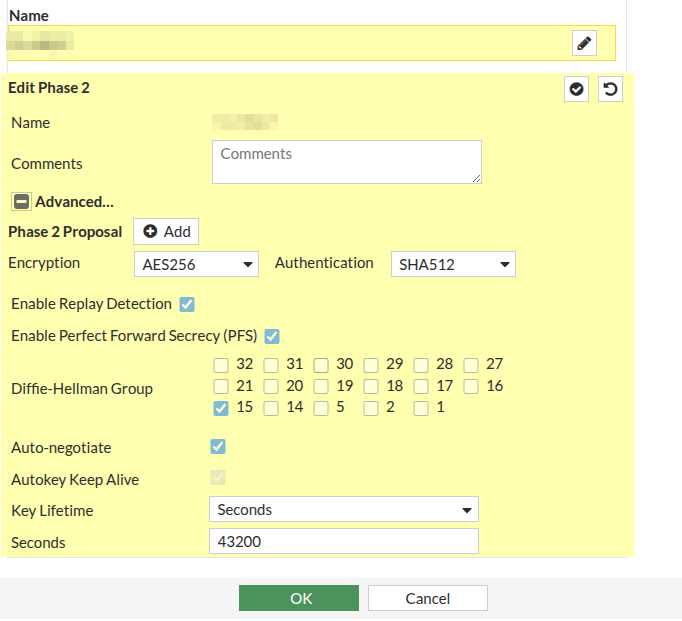
Configure the Phase 2 settings you would like to use here
Click OK at the bottom of your page to save.
Repeat this process if your HUB has multiple WAN Links for redundancy. You will need to change the IP Range of IP addresses you hand out to your tunnel interfaces and you will need to change your Local Identifier.
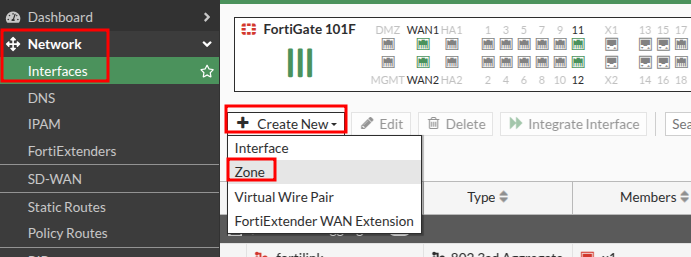
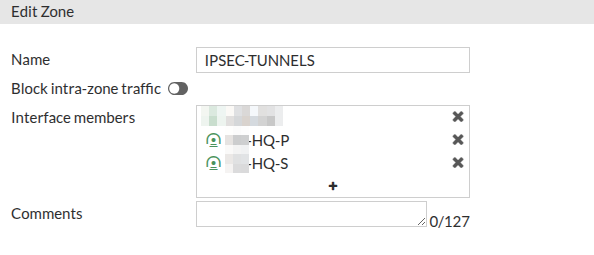
Create a Zone for your IPSEC Tunnels by navigating to Network –> Interfaces –> Create New –> Zone
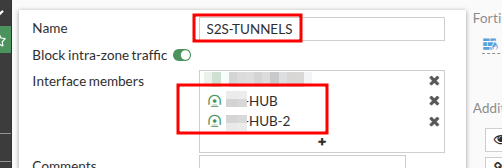
Create a Zone for your IPSEC Tunnel Interfaces, and drop them in.
Create Firewall Policies for whatever you’d like sites connecting via those tunnels to access. In the example below. I have a policy allowing for a device at my hub, to monitor equipment at sites that connect.

Our Hub VPN is now configured, lets move to a spoke.
Create a new VPN Tunnel same as before
Give this one a name.
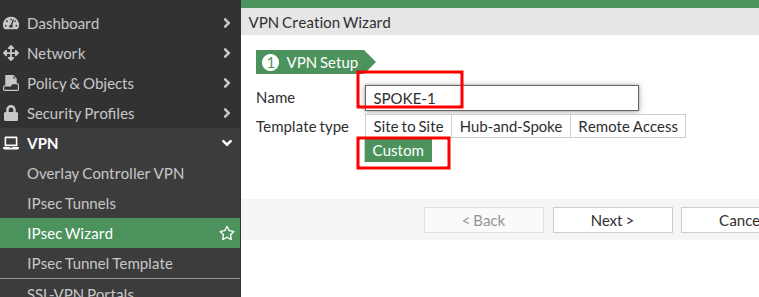
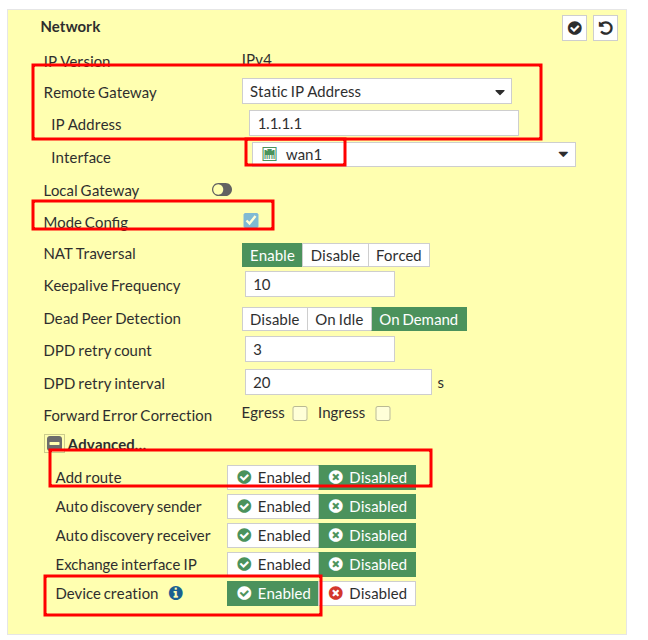
This one is a tad different in the next step, instead of choosing “Dialup User”, we will set a static Remote IP. This IP is the WAN IP of the HUB’s WAN connection that you want to connect to.
- Mode Config box needs to be ticked – this is important for creating the IP addresses on the tunnel
- Disable “Add Route” in Advanced Settings
- Enable “Device Creation” in Advanced Settings
For the next section, use the same preshared key you chose on the Hub and select your desired settings
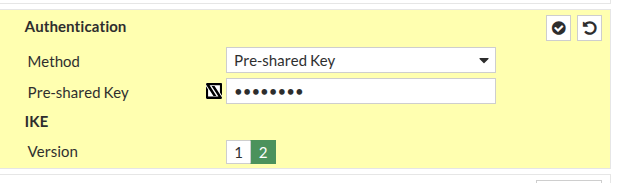
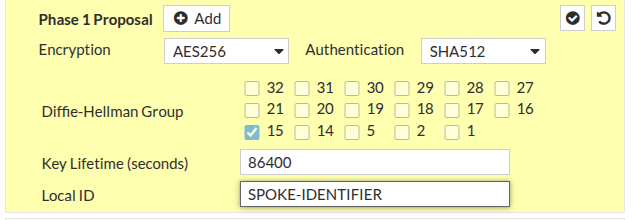
For the next section, select your desired settings and add an identifiable name for your spoke for LOCAL ID
Select your desired settings for phase 2 then click OK to save
Even if your spoke site only has one internet link, you should build a replica tunnel to the spoke secondary for redundancy. Complete this configuration a second time for the secondary link if there is one.
Create an interface zone for the tunnels, same as before and add them to the zone:
Lastly, create a firewall policy however you’d like to control access to/from your spoke. I created a policy from my spoke’s LAN to the HUB Tunnel

This should be all that is needed regarding the VPN configuration and access policies.
In Part 2, we’ll set up OSPF peering on both sites and verify connectivity
Need networking help or assistance?
Email me directly to set up a consulting session!